Rob Stillwell challenged himself by taking a year out – and the photos are stunning. Read on to see how he got these amazing images.
“I always wanted to travel, but before I knew it I’d worked 10 years,” says Rob. “I felt like I was on the treadmill and life was passing me by.”
“I work for a UK university in the field of online learning but also work part time as a photographer shooting weddings and landscape work. I am also a musician playing drums and bass in various local bands.
“I wanted to step off for a bit and ask some questions of myself. I hoped to give myself a different perspective on the things I have in my life and perhaps push myself to take more risks and consider what I would like to do with my career in the next few years.”
Click in the main gallery to see them super-size.
A Round-The-World Ticket

This was my first solo trip. I decided to get a round the world ticket as it worked out relatively cheap. The place I most wanted to visit was New Zealand so the trip was based around that. The trip went as follows:
- India – 1 week (Delhi, Agra, Jaipur)
- Thailand – 7 weeks – Laos, Cambodia
- New Zealand 4 months – Bought a car
- Fiji – 1 week
- USA – 2 weeks West coast, 2 weeks East coast (including Canada)
- UK – 1 week back home in the summer
- Europe 2 months – Belgium, Germany, Italy, Poland, Czech Republic, Slovakia, Holland in camper van
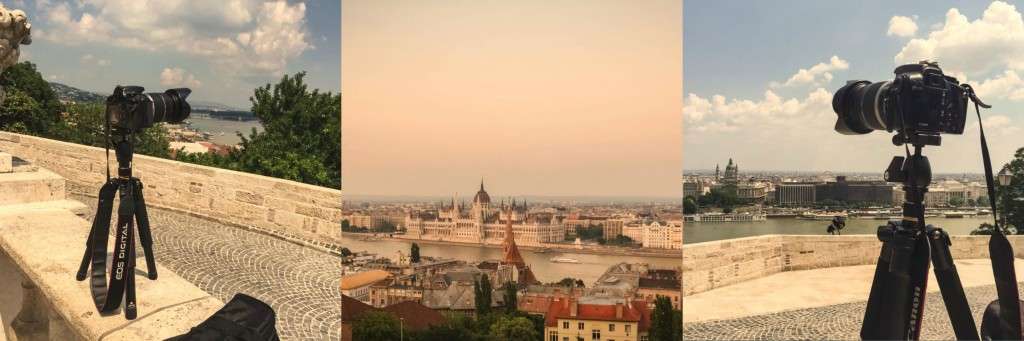
The kit
I travelled as light as I could, taking minimal clothing in order to bring my SLR camera gear. The idea was I could keep all my valuables in my daypack if necessary.
- Galaxy Note3 – used for blogging, taking and backing up photos / video, booking flights and hostels and loads more.
- 2 x 1tb hard drives – I made two copies of all my photos, one stayed in my backpack, one in my day bag.
- OTG Adaptor – this handy USB adaptor allowed me to backup from SD card to hard drive using my phone.
- Canon 6D
- Canon 16-35 F4 ISCanon 50mm F1.8Tamron 70-300mm f/4-5.6 Di VC USD
- Rokinon 12mm F2.8 fisheye (purchased later in the trip)
- Velbon UT43 Tripod – not the lightest around but fairly cheap and uber compact
Horseshoe Bend

Canon 6D, Canon 16-35mm f4, Polarising Filter 16mm ISO 200, f14, 1/80th second exposure
This iconic view of the Grand Canyon in the US is very popular with visitors. It is difficult to convey the scale of the view – even using my widest lens a lot gets left out. I tried to include a little of the rocks in foreground to add a sense of scale.
How I captured it
This was a relatively straightforward shot to capture due to the decent light. Aiming to get the aperture as high as I could to sharpen up the shot and get as much in focus as possible. I used a polarising filter to reduce reflections on the water and to enhance the sky a little.
Queenstown Runway
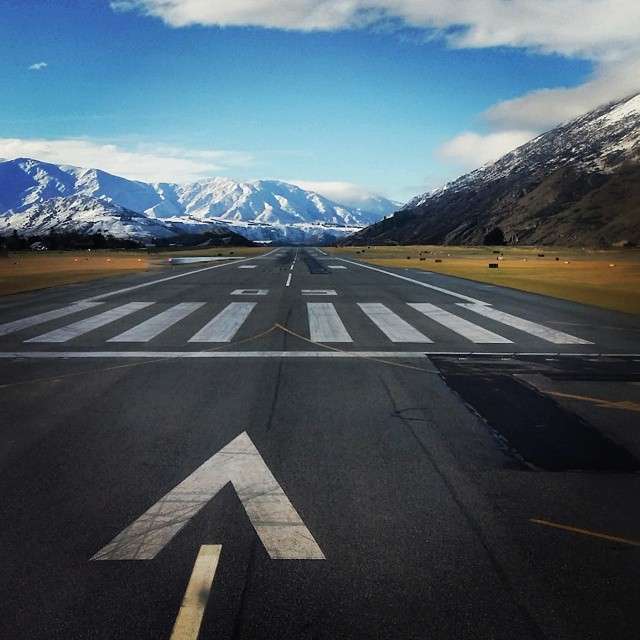
I was lucky enough to stay with a friend in Queenstown, New Zealand, and get out on a snowboard just before leaving the country. I paid a few dollars extra to have a window seat on this scenic flight back to Auckland – and was able to survey the landscapes I had driven around over the previous months.
Just as the plane was turning on the tarmac, I used my phone to take this quick snap looking up the runway to the mountains through the window. I love this shot and it reinforces the fact you don’t need top camera gear to capture good photos.
How I captured it
Nothing tricky about this, simply pointed and shot on my camera phone. I did use Instagram to edit the photo to sharpen the image and boost the colours and contrast a bit.
Meteors Over Carew Castle
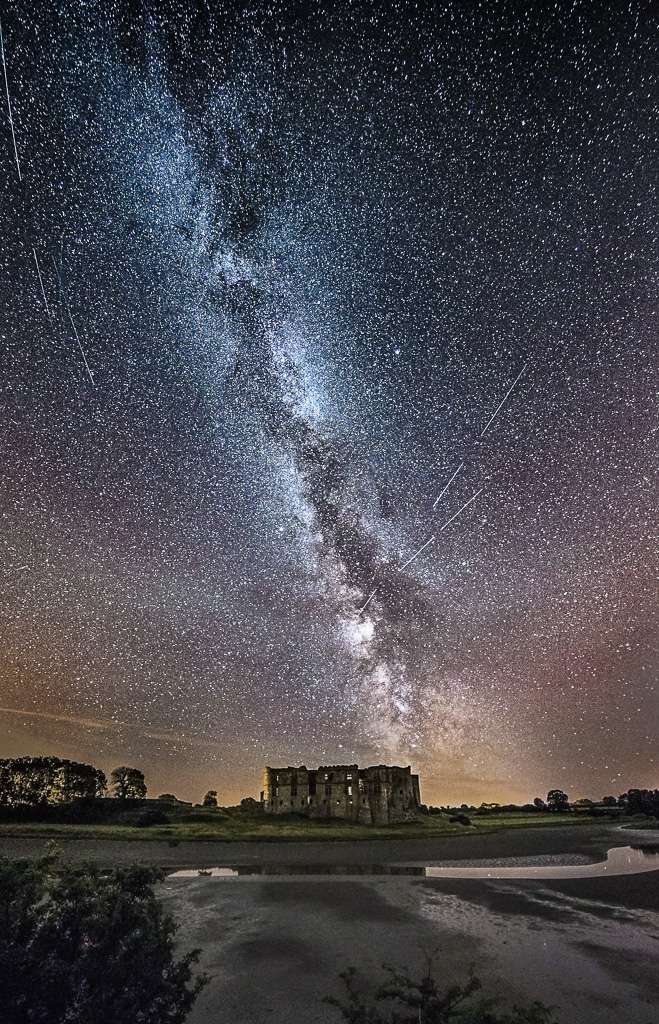
Canon 6D, Rokinon 12mm f2.8, 12mm, ISO128000, f2.8, 20 second exposure. 5 images combined in Photoshop
Ironically, the most successful image I have created this year in terms of social media response was taken three miles from my parent’s house in Wales.
I decided to spend a month in the UK during the summer and part of that where I grew up in Pembrokeshire, Wales – a truly beautiful part of the world. Only recently I’ve come to appreciate how dark the skies can there
I very nearly didn’t take this photograph. I was feeling pretty wiped out, but sometimes it is worth forcing yourself out to see what happens.
The Perseids meteor shower was at its peak and the clouds had cleared so I headed off to a beautiful castle nearby. If the tide had been in it could have been even more spectacular with reflections of the stars. I fired off about 10 shots and spent the rest of my time down there helping another guy out so he could get some nice shots on his camera.
I didn’t think I had anything too fantastic until I got home and looked at the photos on my laptop. I posted the image to my blog and submitted it to the BBC in the UK. By the end of the day, it was on the national news so I was super pleased.
How I captured it
To capture the stars you need a bright lens that lets in as much light as possible. I used a high ISO in combination with a wide-open aperture at 2.8. I don’t tend to use exposures of longer than 20 seconds of the stars as you begin to capture their movement then.
The lens I used is a fish eye so I needed to correct the distortions in Photoshop. I did this using a plugin called Fisheye Hemi.
Once this was done, I set to work bringing out all the details of the stars. I use a lot of the clarity setting in Adobe Lightroom to do this. I decided to overlay a couple of photos in order to place some additional meteors into the image. There were one or two in each shot so I didn’t need to use many.
Lower Manhattan at Dusk

Canon 6D, Canon 16-35mm f4, B+W 10stop ND filter 26mm, ISO 200, f14, 30-second exposure
New York was my last stop in the USA and I really wanted to get some strong shots. One thing I learnt early was to research locations for photos, particularly when not staying long – and this is an example of how it can pay off.
I found this location just over the Brooklyn Bridge having researched online. The downside was there were quite a few other people fighting over the spot.
How I captured it
I waited until after sunset for the lights to come on in the buildings of Lower Manhattan while maintaining a little light in the sky.
I used an ND filter to get a longer exposure to smooth out movement on the water. I originally exported a black and white version of the photo to my phone and did a quick edit using Instagram. I later recreated a full size version of the photo in Lightroom as I liked the colour effect.
Niagara Falls
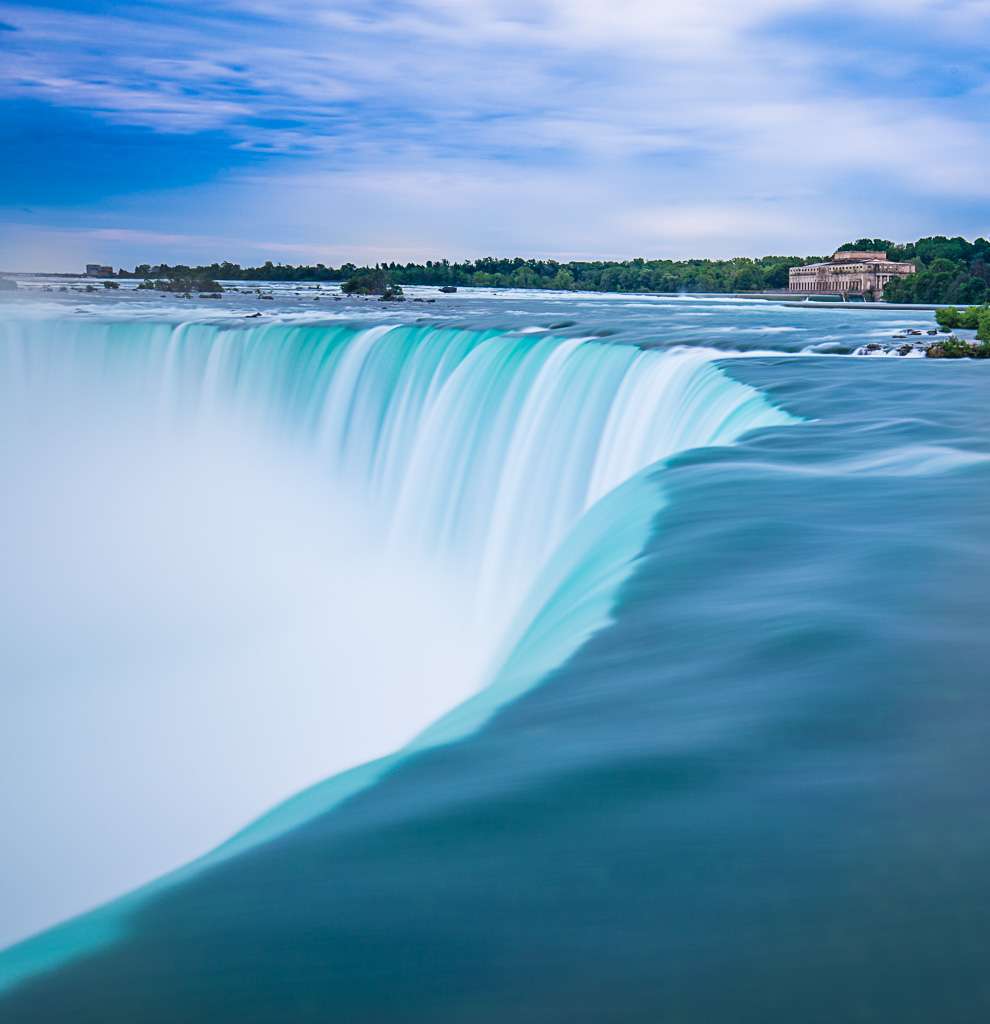
Canon 6D, Canon 16-35mm f4, B+W ND10 Stop Filter 28mm ISO 100, f10 13-second exposure
I was staying with my gran who lives about an hour from Niagara. She offered to lend me her car so I could go visit. The weather and light weren’t too great; – it was overcast and began to rain.
I looked at postcards and photos for sale to get an idea of where local photographers shoot and a lot of locations looked difficult to get to or somewhere you’d need permission. I ended up using one of the main tourist spots for this shot.
How I captured it
I used an ND filter to capture and smooth the movement of the water. It was a tricky location with my tripod sat precariously on the wall, so I didn’t go for an especially long exposure and thanks to the fast moving water didn’t need one. I boosted the contrast and saturation in post-production.
Ghost Town

Canon 6D, Canon 16-35mm f4 16mm ISO 6400, f4 30-second exposure
I spent a couple of weeks exploring the west coast of the States with a fellow photographer I met in New Zealand. We were aiming to photograph a salt lake famous for rocks that move over time called the “sailing stones”.
Having failed to get there and getting the car stuck, we drove all night to get there via different roads. As part of that we stumbled upon this ghost town at around 1am.
Being Death Valley the temperature was still around 100 Fahrenheit – an odd experience at that time of night.
How I captured it
I set up my camera on the tripod with a high enough ISO to capture the stars in the sky. I used a longer exposure to capture the cloud movement. I lit the scene using my head torches’ red light whilst the camera shutter was open. No post-production done, copied off the camera and posted to blog.
Lake Tekapo
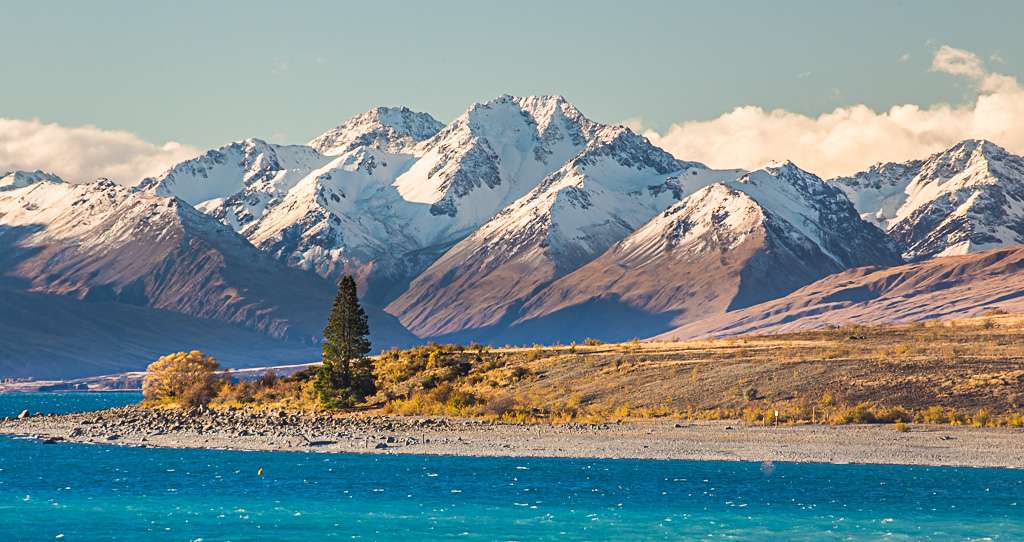
Canon 6D, Tamron 70-300mm, Polarising Filter 300mm ISO 400, f13, 1/50th of a second
This stunning location on New Zealand’s South Island is a photographers dream. Designated a dark sky location, it is fantastic for shooting the stars.
The incredible scenery and mineral rich, glacier fed lakes make it difficult to get a bad shot. I took many photographs here and am yet to edit them, but this is one I posted onto my blog.
How I captured it
The colours in this scene and the lone green tree caught my eye as I was driving past. I enjoy using telephoto lenses for landscape photos and this is one such example of where they can be used.
Admittedly, I should have probably used a faster shutter speed but thanks to the stabilisation in the lens I used I got away with it. As with most shots I used a smaller aperture to improve the sharpness of the image, useful with this slightly cheaper lens.
Campfire Headphase
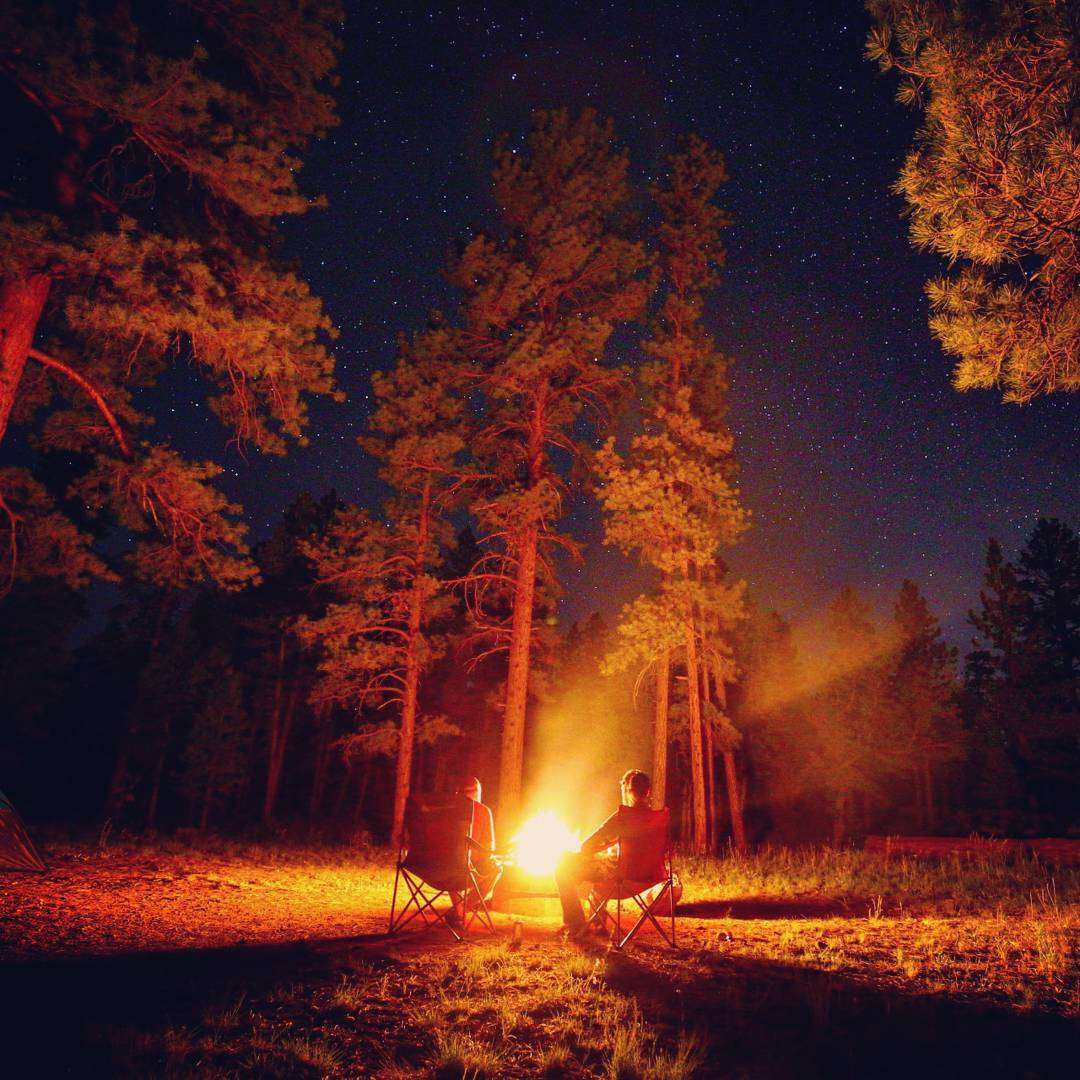
Canon 6D, Canon 16-35mm f4, 16mm, ISO 6400, f4, 8-second exposure
This was my last night camping in the national parks on the west coast of the States with fellow photographer Glenn.
Every night we would have a fire like this and often cooked our food on it. It was an exhausting but fantastic couple of weeks exploring various parks. I saw the way the trees were being lit up by the fire and decided to capture the moment.
How I captured it
I composed the shot using the shadows cast by Glenn and myself to split the foreground into three. I wanted to capture some of the stars and the height of the trees. Using the 10-second timer on the camera, I manually focused the lens, set the aperture and ISO and shutter speed to bring out a small amount of detail in the stars.
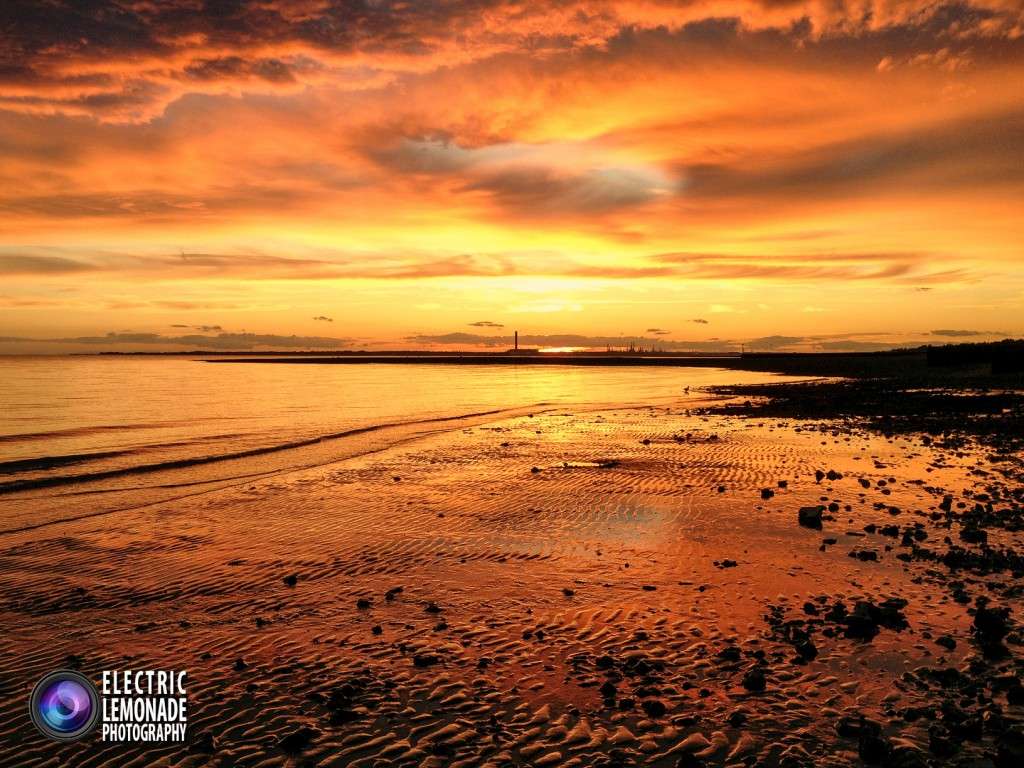
Dutch Sunset

Canon 6D, Canon 16-35mm f4 25mm, ISO 100, f22, 0.8 seconds
I took a chance to get this shot, the weather had been bad for a couple of weeks and I had been uninspired photographically. I set off on a 30 minute drive out of Amsterdam to a place called Kinderdijk.
I got stuck in some bad traffic and my GPS tried to take me down some crazy non-existent roads over water. This place is usually very busy from what I have heard, but at this time of day meant it was nice and quiet.
I was trying to find a composition that would work and took a few ok shots. Once I saw the sky starting to light up the bottom of the clouds, I thought it would be good to try and focus on making the most of that by using the reflection on the water the silhouette of the windmill mirrored on the lake.
How I captured it
By using a small aperture I was able to get a sun star look to the sun. I used a tripod and as slow an exposure as I could in order to smooth the reflections on the water. Like many of my photos on the road I posted this straight from my camera to the blog via the Wi-Fi on my phone – it could probably be improved with some post production work.
Toronto Streets
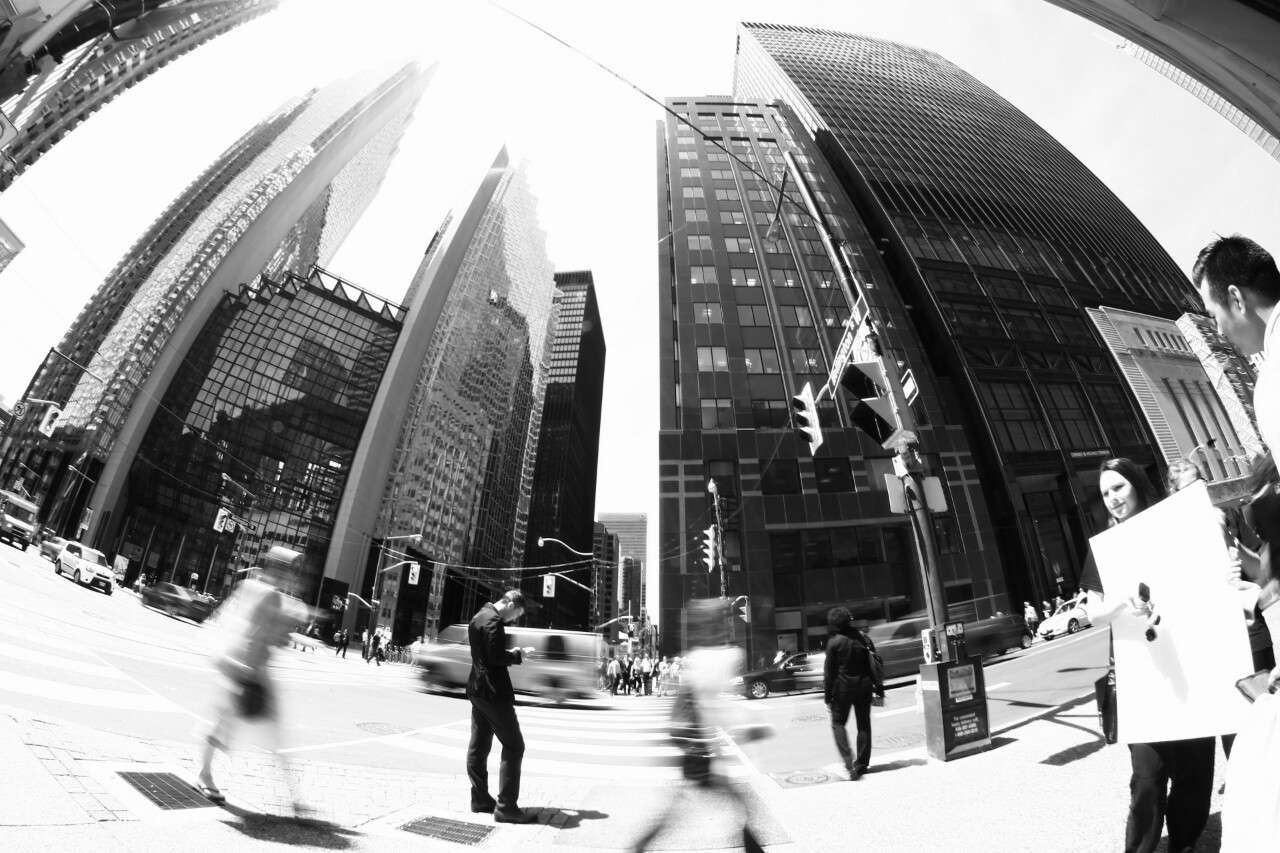
Canon 6D, Rokinon 12mm f2.8 12mm ISO 100 f22, 1/8 of a second exposure
I arrived in Toronto wanting to experiment with a newly purchased fisheye lens I bought in Las Vegas. Composition with such a wide lens is tricky as pretty much everything in front of you is in the frame.
I wandered into the business district of and used the lens to distort the tall office buildings, looking for ideas for photos. I still found scenes too busy and hard to find a point of focus in the frame. I also wanted to capture the area’s hectic feel.
How I captured it
I decided to start shooting black and white in camera as it simplified the images. Due to the lens’s extreme angle of view I could shoot handheld at slow shutter speeds and blur the movement of people and cars. I spotted the one businessman stopped at the lights and decided to move the focus on him as others walked past.
Lightning Strikes
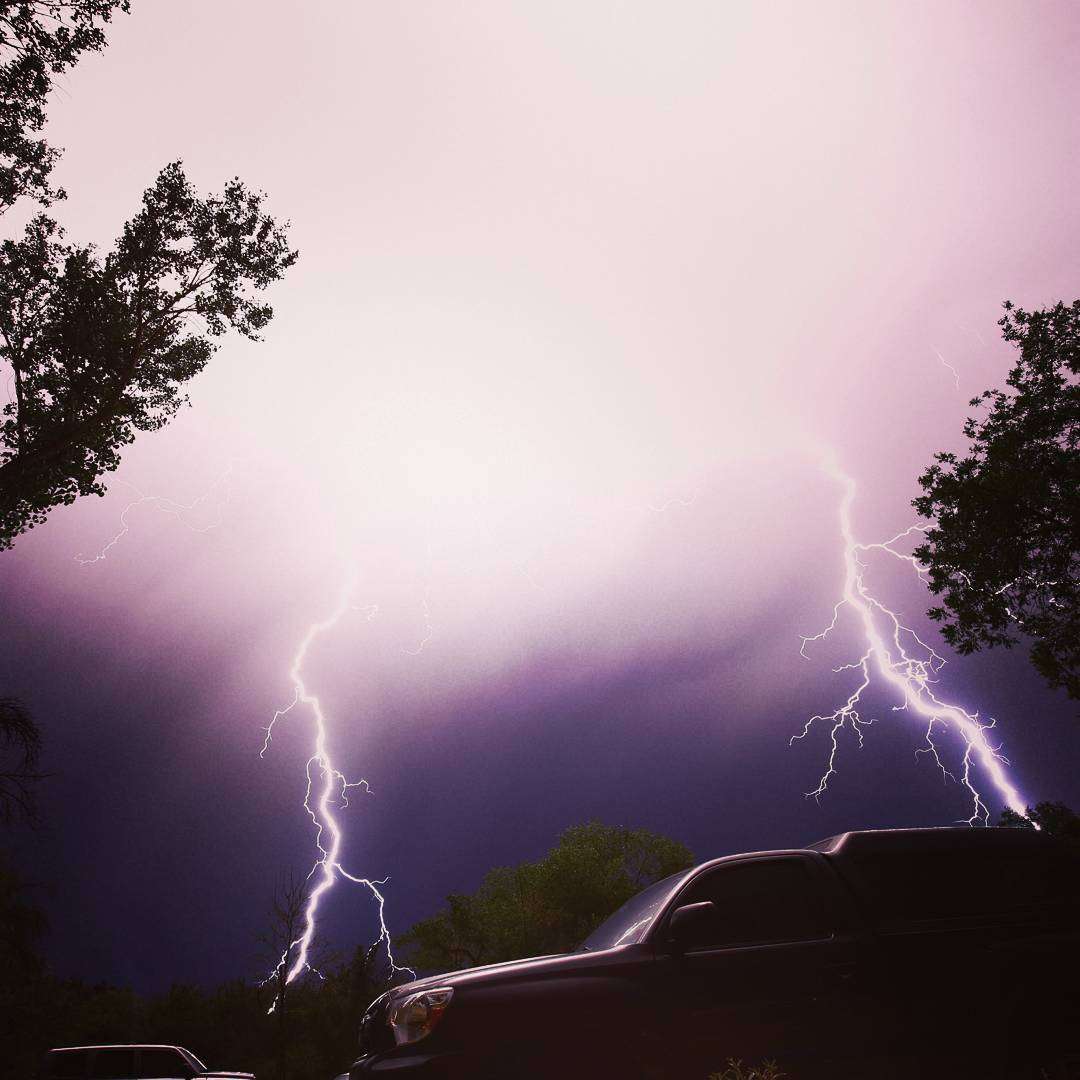
Whilst camped in Zion National Park a thunderstorm rolled in up the valley. I’ve always wanted to capture lightning but not had many opportunities. I quickly got my camera out on the tripod and put in some settings I thought might work. Pretty much as soon as I pressed the shutter a huge clap of lightning struck really close by.
How I captured it
I knew I needed a relatively long exposure to increase my odds of having the shutter open when lightning struck. I probably should have used a slightly lower ISO or smaller aperture – I didn’t quite get them right as some of the lightning is blown right out but still made a cool photo.
A Good Boss
Rob was fortunate thanks to a good boss and a forward thinking workplace to get the opportunity of a year of unpaid leave from work to allow him to do take this trip. He also undertook lots of extra work outside of primary job to get together the funds to go.
Blogging
I decided to start the travel blog primarily to keep friends and family updated with my trip and what I was up to. I didn’t want it to become a burden so I only posted when I felt inclined to but before long I was into a nice routine.
I chose to use Tumblr as I was only taking a smartphone with me and I liked the app and the way the blog displayed my photos. The limit of 10 photos at a time also proved to be a useful constraint as time went on. My blog can be found at http://careerbreak.tumblr.com
- Rob’s Travel Blog: http://careerbreak.tumblr.com/
- Instagram: http://instagram.com/rob.stillwell/
- Twitter: https://twitter.com/rob_still
- Facebook: https://www.facebook.com/robstillwellphotography
- Website and prints available to buy: http://www.robstillwell.co.uk